Summary
The procedurePrevention: backupCommentsHave you ever accidentally deleted an entire album of photos on your smartphone? False manipulations, it happens every day. What matters is being able to recover your deleted photos when they shouldn't have been. Here are the tried-and-true methods to make things right.
Smartphones are prime tools for capturing your memories in photographs. Losing your photos can be problematic – if you don't back up anything to the cloud, to Google Photos for example, but there's a way to go back and recover a good chunk of your snaps.
The procedure
Root is necessary
If this is not already the case, you will first need to root your phone (7 reasons to root your Android device) . We have the ideal tool to guide you: KingRoot. Obviously, this procedure is not trivial, do not hesitate to inquire and save your data before you start.
Tutorial: Root your smartphone or tablet in one click with KingRootOften one of the first steps to take for those who wish to modify their device in depth, rooting is not always an easy step. Luckily for the less resourceful among us (and the more…Read More
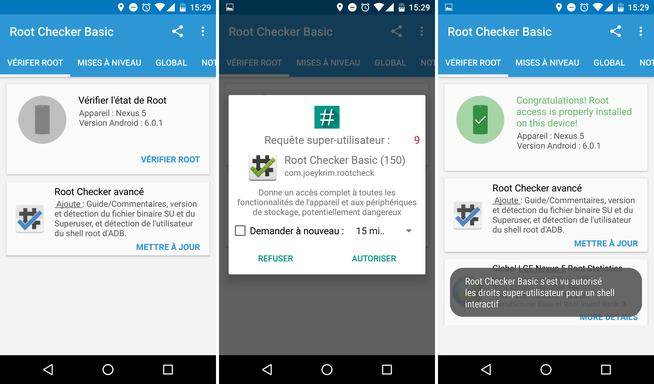
To verify that you have root access, you can use the Root Checker application.
7 reasons to root an Android device
You may have heard this word before, but not be particularly interested in it. “Roots”. Behind this Anglicism meaning “root” is actually a practice resulting from systems based on a Unix kernel…Read more
DiskDigger, our saviour
You will then need to equip yourself with an application found on the Play Store, DiskDigger, which will do all the work for you.
Once the application is launched, select the full scan option. The application should then ask you for superuser rights, press "allow" to see all the files attached to the root of the phone appear. It is inside these that the copies of the deleted photos are located, and more precisely in the /data folder.
From there, you will have to be patient since the scan of the phone's internal memory may take a while: allow at least 15 good minutes to scan 16 GB of data. Depending on the performance of your device and the storage space, the wait is more or less long.
Once the process is complete, all of your deleted photos should appear. All you have to do is select them and click on the big Recovery button in the top bar. Several options are available to you as to the desired destination. Go back to your Gallery where you should now see your lost snaps.
Avoid accidents by saving your photos
Of course, we managed to save your photos, but this is not an operation to repeat every day. It is heavy and long. There are various preventive solutions to avoid this kind of problem.
We are obviously thinking of Google Photos, which allows you to save all your photos in the cloud once you are within range of a Wi-Fi network. The photos are saved in high quality, and it's unlimited . Just go to the app settings and set the upload frequency. There are other ways to save your data, we have dedicated a file to this subject.
How to back up and restore your Android smartphone data?Whether it's to transfer your data to a new smartphone or to protect yourself from losing your data in the event of theft, here's how to backup your smartphone data …Read more
Another solution is to manually transfer all of your photos to an external storage device, either through a computer or a microSD card. However, it is more tedious.
Google Photos
Download Google Photos for freeAPKAnd you? Have you ever found yourself in such a situation? How did you get out of it? Tell us everything in comments.
To follow us, we invite you to download our Android and iOS application. You can read our articles, files, and watch our latest YouTube videos.
